For this post, I finally got to the part I’ve been waiting for: installing the Head Unit on my Lancer. Below is the video i used as a guide throught the installation process.
Installing the new head unit started with removing parts of the dash to access the stock unit. First, I had to open the glove box and loosen two screws to get it out of the way. Once the glove box was removed, I tackled a plastic trim piece that runs along the dash. It was attached with clips, so I carefully used a pry tool to pop it off without breaking anything.
Next, I had to remove the hazard switch module, which was held in place by three screws. Once that was out, I carefully pried out the center console to create enough space to reach the head unit. This part was a little tricky, but taking it slow and making sure nothing was forced helped me avoid any scratches or broken clips.
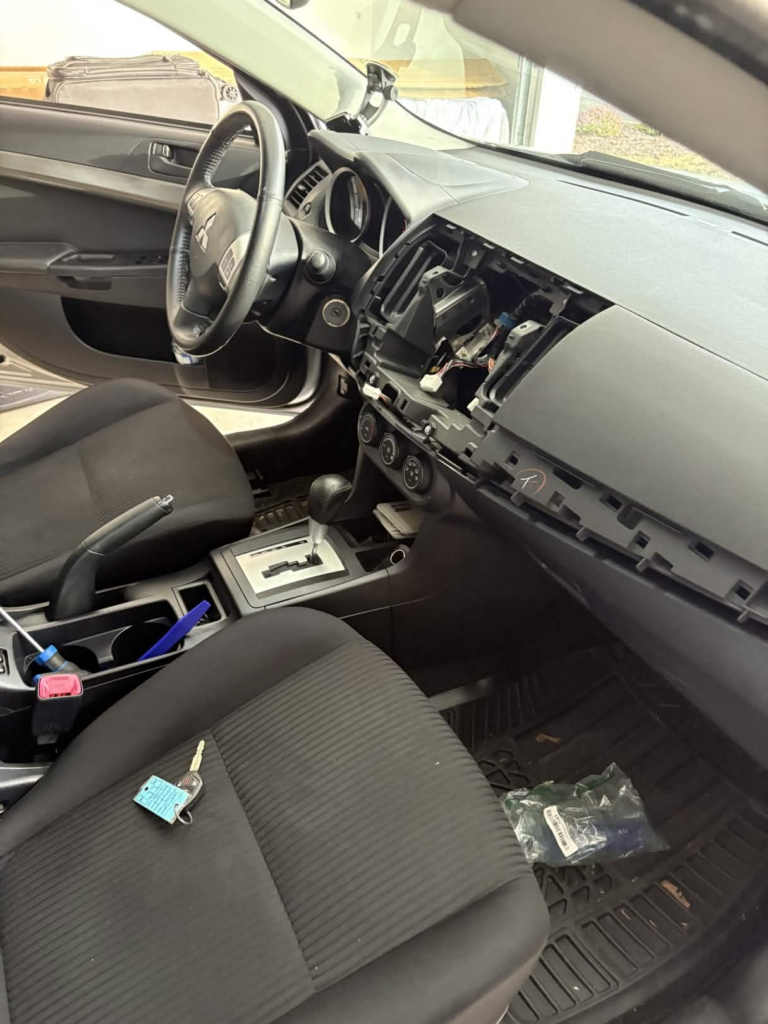
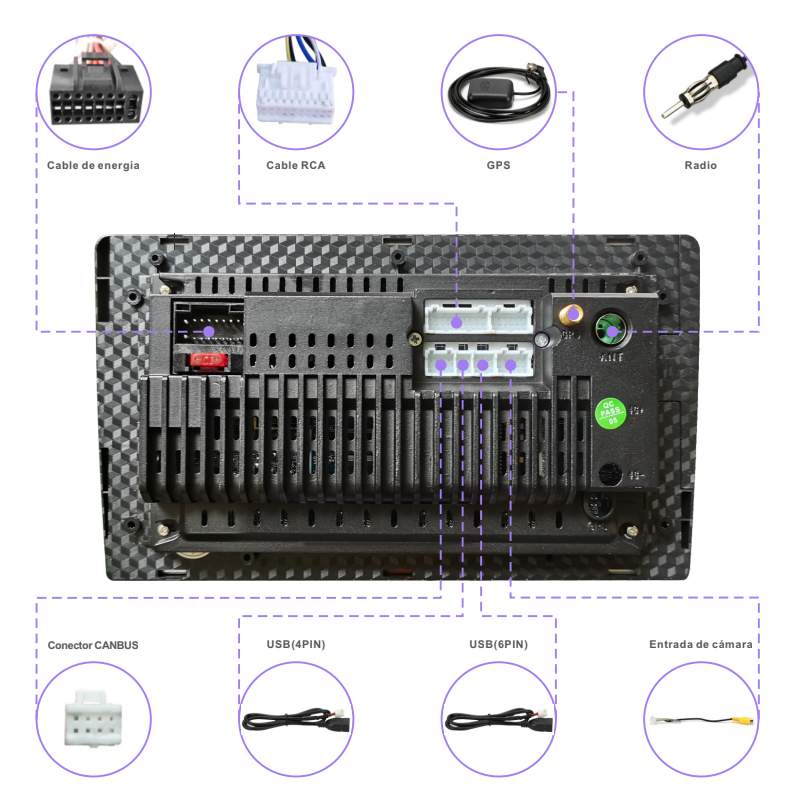
Finally, I got to the head unit itself. It was held in by four screws, and after removing them, the old unit came out cleanly. I disconnected the cables from the old head unit and installed them in the new head unit. The installation process was quite easy as all the cables was plug and play. Below is a picture that I used to plug in the correct cables.
In the next post I will test the head unit and try to install the backup camera hopefully.
Oh, my! I have taken many things apart to fix, but getting them back together is all together different exercise! I am rushing to your next post to find out how you did!